How To Create Faux Calligraphy + A Giveaway!

Learn how to easily create beautiful hand lettered calligraphy – using just a pen!
This post comes from our blog intern, Natalie!
Ever wondered how the beautiful script found all over Pinterest and our blog is created? Modern calligraphy is becoming wildly popular, making evening the simplest words special when written with artistic penmanship. I’m going to let you all in on a secret – and it may come as a surprise to some – but a lot of the time this calligraphy isn’t actually made with a calligraphy pen and ink. Instead, it is created with a regular pen, and a few simple techniques. With a little practice and supplies that should already be lying around your house, you will be able to start writing out Monday inspiration quotes of your own.
Check out the steps below and leave your favorite quote in the comments to be entered into a giveaway! We will pick one winner to have their favorite quote hand-written, framed, and mailed to them by us at the home office!

What you need:
Pencil
Eraser
Black pen
Paper
When you know what you want to write out, begin by gathering inspiration online. Having in mind what your lettering will look like makes things easier when you start writing. I often look up quotes on Pinterest to get ideas for new ways to shape letters and format the words.

Once you’re inspired, the next step is to lightly write out your words in pencil on your paper. Essentially you are just writing in cursive, but don’t be afraid stylize the lettering and exaggerate certain parts of the script. The more unique, the better. This takes practice, so continue to try different ways of writing letters until you find something you like.
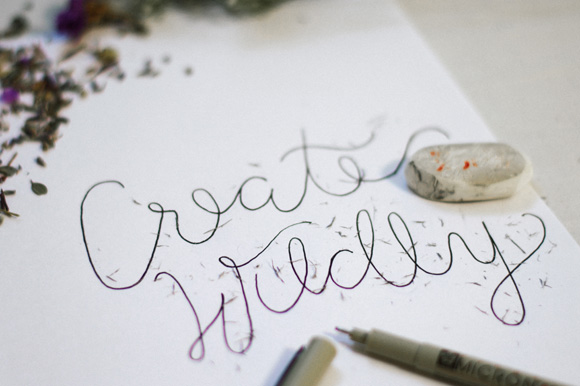
The next step is to go over what you wrote in pencil with a fine point black pen. Trace the words carefully, but don’t worry if it looks a little different than it did in pencil. Once the pen has dried for a few seconds, erase the pencil lines that are still visible.
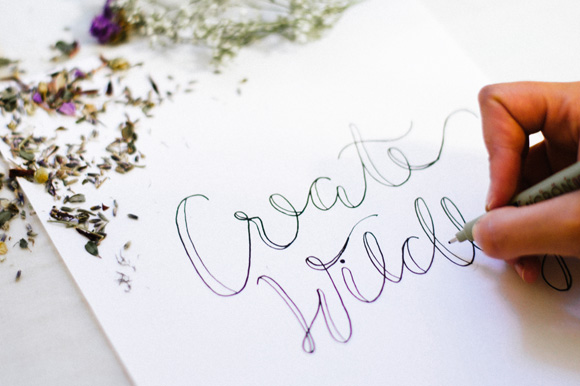
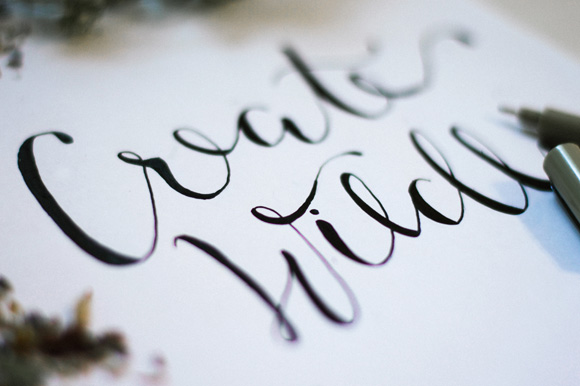
Now the magic happens. The basics of real calligraphy is to apply pressure on any down strokes while writing, creating a mix of thick and thin lines. This same concept applies to faux calligraphy. You want to draw in the outline of a thicker line on any part of the letter that was a down stroke when you wrote it initially. At first you will have to think about what section of the letter this would be before making the line, but as you practice more, knowing where to make it thicker will come naturally! This is the most important part to making it look like real calligraphy, so make sure to take your time.
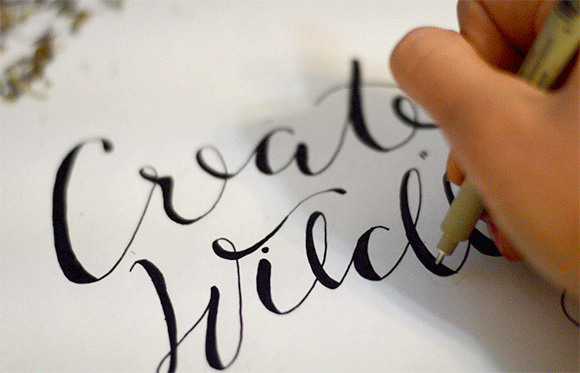
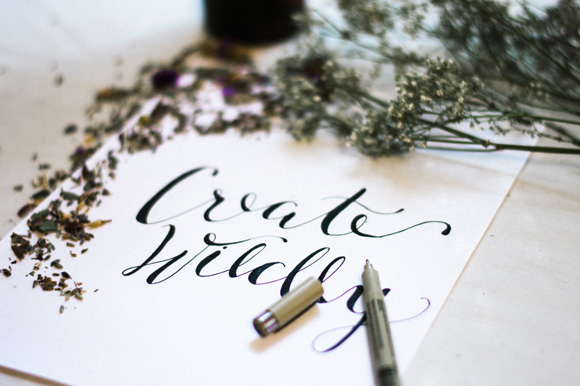
The last step is to carefully fill in the spaces where you created the thick lines with your pen!

+ Don’t forget to leave a comment below with your favorite quote to be entered into the giveaway!
Follow Natalie on Instagram and FP Me!