DIY Woven Pillow

There is something about the art of weaving that has really captured my heart. Not only is the process cathartic and unwinding, but the end product is beautiful and hand-touched. It’s an intuitive art with no real complicated techniques, and that makes it accessible by all.
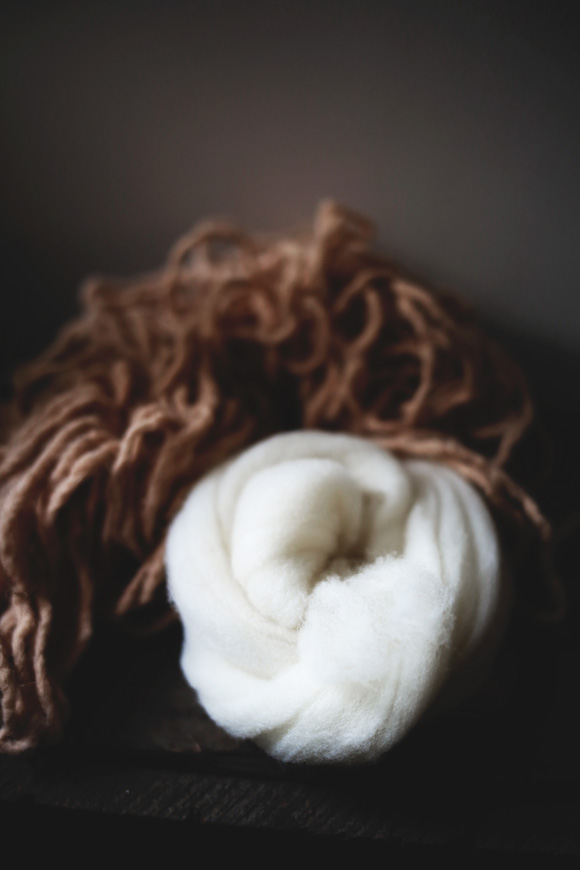
My favorite weavings feel very natural and soft. Lately, I’ve been very inspired by the use of roving, or unspun yarn. I like how bulky and fluffy it is, so silky to touch, like cotton. I’d been wanting to make some weavings to experiment with what it could do.
Since moving in to a new place over a year ago, I had yet to purchase couch cushions. All the ones that I fell in love with, seemed too silly or expensive. Or maybe, I just wasn’t ready to feel like a real adult, couch cushions and all. Either way, at some point I reached an epiphany and decided I would make my own. They would be exactly what I wanted, would incorporate the weaving inspirations I loved so much, and wouldn’t cost me more than my I-will-never-grow-up-attitude could concede to spend.
And thus, this DIY was born. Woven pillows with beautiful, bulky, raw, and utterly soft, roving.
You’ll Need
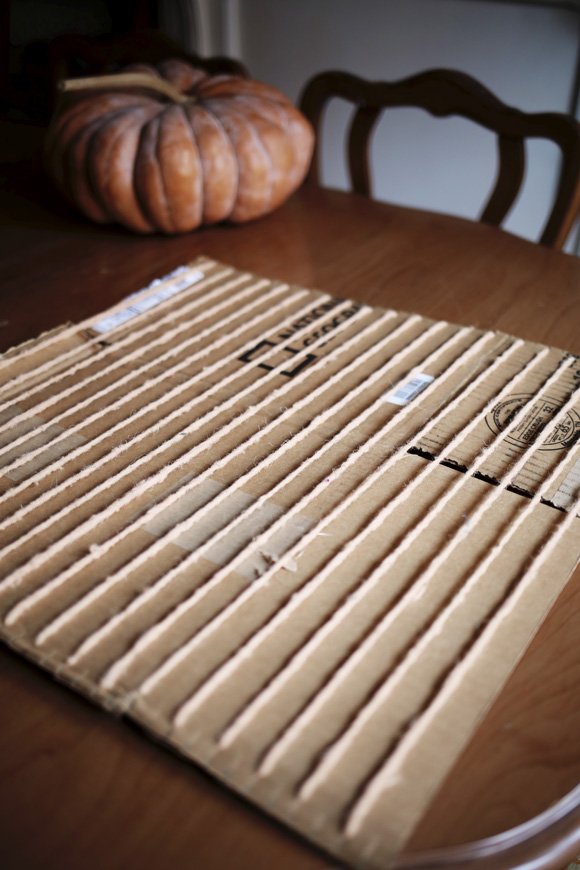
- (1) 20” x 20” piece of cardboard
- 2.5 oz roving (I purchased mine here & love the quality)
- 5 oz bulky yarn of your choice
- Scissors
- Pillow Stuffing
- Ruler
- Pencil
- Duct tape
Directions
- Take your piece of cardboard, and measure 1/2” from the edge. Make a little tick mark with your pencil here, and then continue making tick marks every 1 inch across. Do the same along the opposing side of your cardboard, so that you’ve done so on two sides of the square.
- Cut little slits about 1/2” in length along each tick mark you made with your pencil. These will serve as small anchors for your yarn.
- To string your “loom”, slide a piece of yarn into the slot, leaving a roughly 2 inch tail. Bring the yarn across your cardboard, and affix the other end in the opposing slot. Trim, leaving a 2 inch tail on this end as well. Continue across the board, until all slots are full.
- Flip your loom over, and duck tape the tails down to hold the yarn into place.
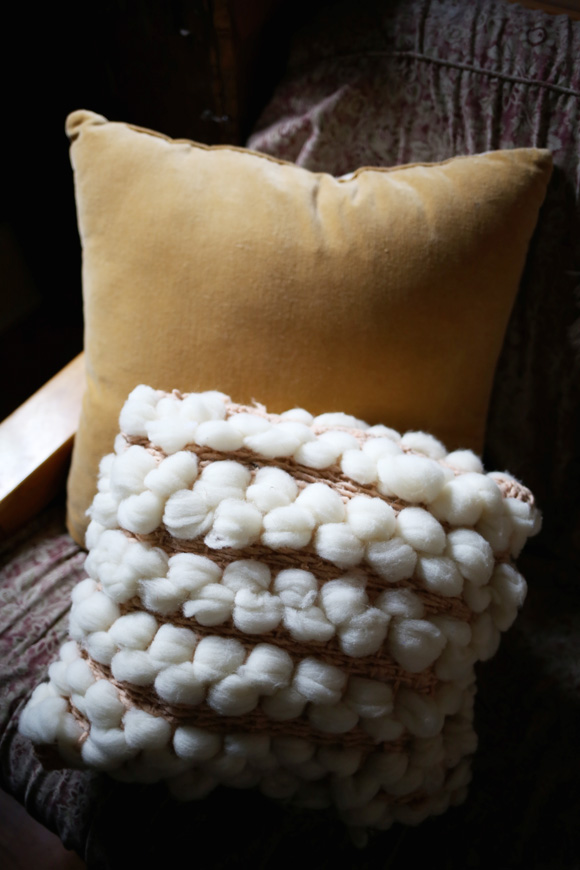
- To start out, weave 6 rows with your bulky yarn. Trim at the end and weave the tail in, so it’s not hanging.
- Take your roving, and weave 2 rows, over under. As you do so, pull the over segments up a little, so you can slide roughly one finger underneath. Leave the little loop sticking out slightly, so you get the bumpy look.
- Continue weaving, 6 rows yarn, 2 rows roving, until you finish the square.
- Remove from your loom, and set aside. Then repeat steps 3-7 to make another identical square.
- Decide which are the sides of your weaving that you want facing out. Put those two sides together, so that they touch and face each other. Take a scrap piece of yarn, and sew up the two sides of your pillow, tying off at the end. Turn inside out, so that you now have the correct sides facing out.
- On the bottom of your pillow, take the little 2 inch tails that you left hanging. Tie them off with their corresponding piece on the opposite square, to close off one one side. Trim tails after you’ve knotted.
- Stuff pillow as much as you can, and then do the same to tie off the top with your loose strands. If you need, you can also sew up little holes with a scrap piece of yarn.
- Once you’ve finished, you will have a brand new pillow!
Follow Naomi on Instagram @NumieAbbot
Check out Naomi’s blog Numie Abbot