Summer Meets Fall With Pressed Flower Candles
Summer Meets Fall With Pressed Flower Candles

The soft murmur of a new season is on the horizon. Suddenly, we’re all sick of wearing sandals and cut offs, and sure, we still love the beach, but does it have to be so hot every day? The collective yearning for apples and cider, cold air, and layers.
I think it’s second nature to glamorize fall, we look forward to having a little change in our lives, and while some upheavals can be scary, the change of seasons is inevitable and entirely safe. Something new, but expected. Something fall will never have, though, are the bright blooms of summer. Farmer’s markets bursting with bouquets of zinnias, sunflowers, and daisies. To bring summer’s best flowers into a new season, I press them between the pages of heavy books, fold them into journals, and now, engulf them in beeswax to be discovered on cold nights with the flame burning low.
Here’s how:

What you need:
1 pint size Ball jar
1 block of 100% beeswax (or natural wax of your choice)
1 natural wick
Pressed flowers or herbs (100% dry)
Double boiler OR a clean empty can and a pot
1 old paintbrush
An old knife
Cutting board
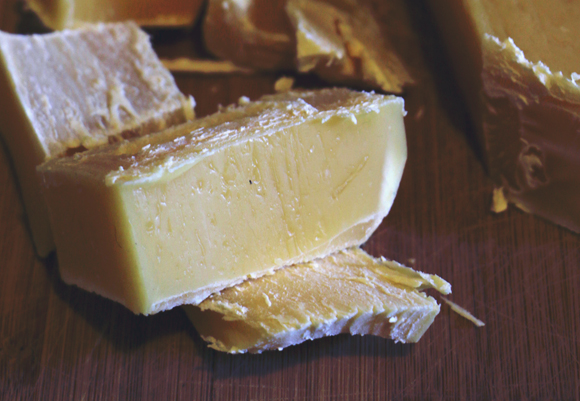
On the cutting board, use the knife to chop the wax into smaller chunks that will fit within the empty can.
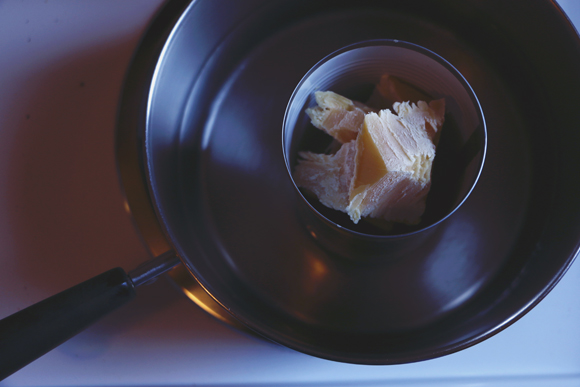
Place a few chunks of wax into the can (or double boiler), place the can into the pot, and add 2″ of water. Heat on medium until the wax is melted, then lower the temperature until the water calms to a simmer.
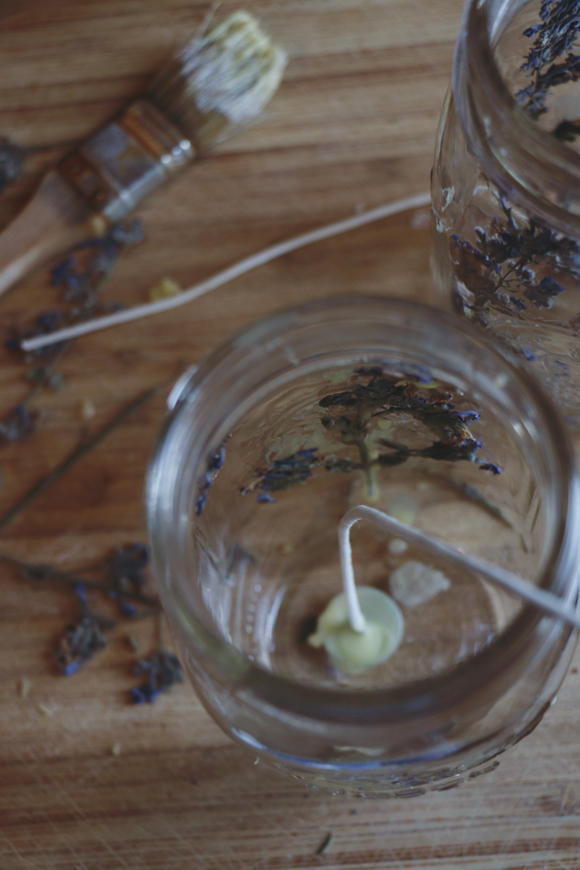
Dip the brush into the melted wax and apply the pressed flowers to the inside of the jar. Bear in mind that the flowers won’t stay completely put when you pour in the wax, but this will help them stay towards the outer edges. To anchor the wick, dip the metal end of the wick into the melted wax and lower it to the bottom of the jar. The melted wax will adhere the wick to the bottom.
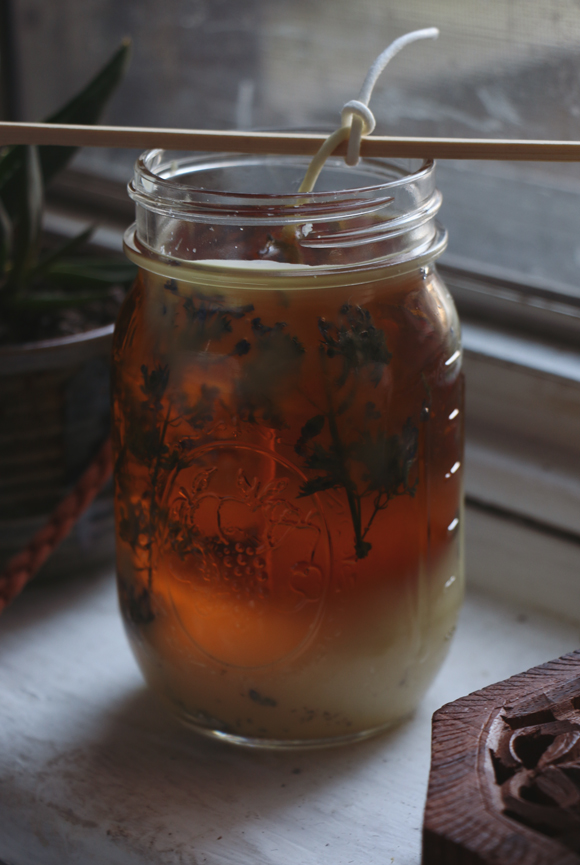
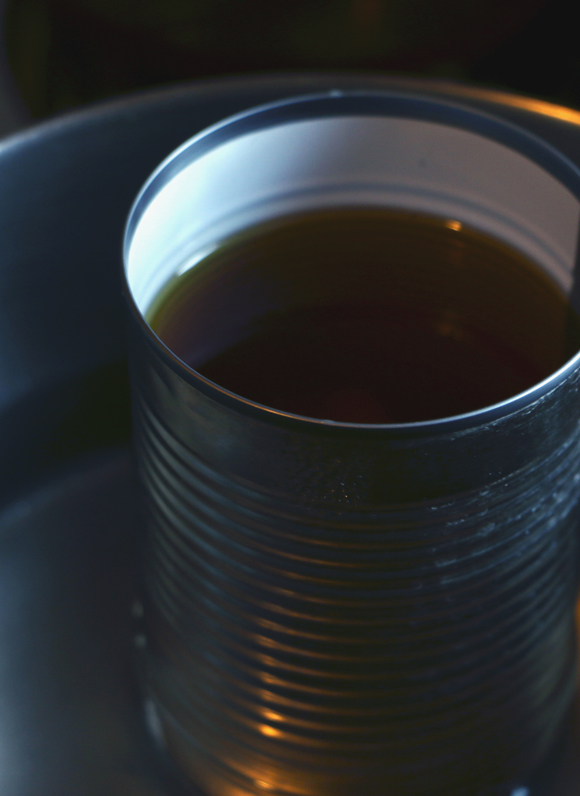
As the wax melts, add more chunks until the can is nearly full. Once the wax is completely melted, use an oven mitt to very carefully remove the can from the water, and slowly pour the wax into the jar. Depending on the size of your can, you will likely have to melt more wax, repeat these steps until the jar is full.
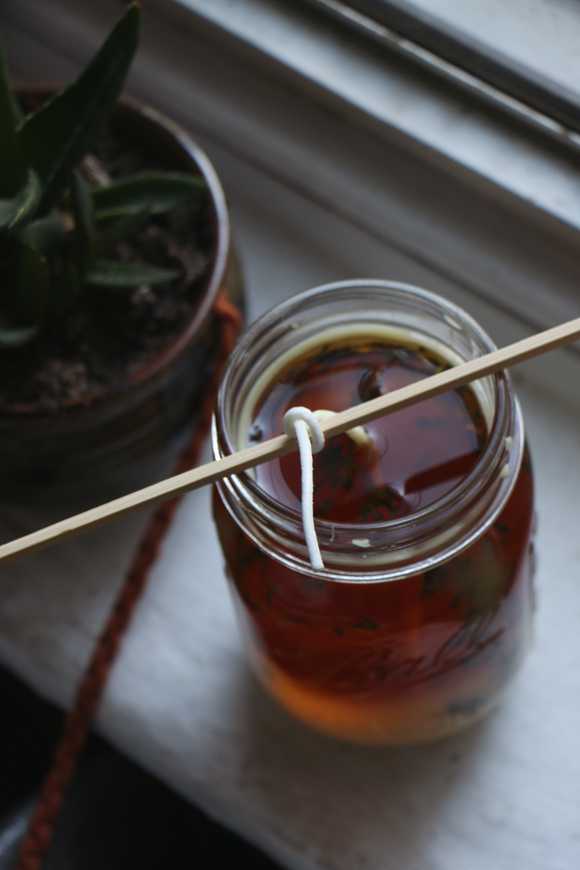
To keep the wick from sinking, gently tie it around a pencil or chopstick. Allow the wax to cool completely. Trim the wick to 1/4″ before burning and always remember to keep the candle within sight while it’s lit.
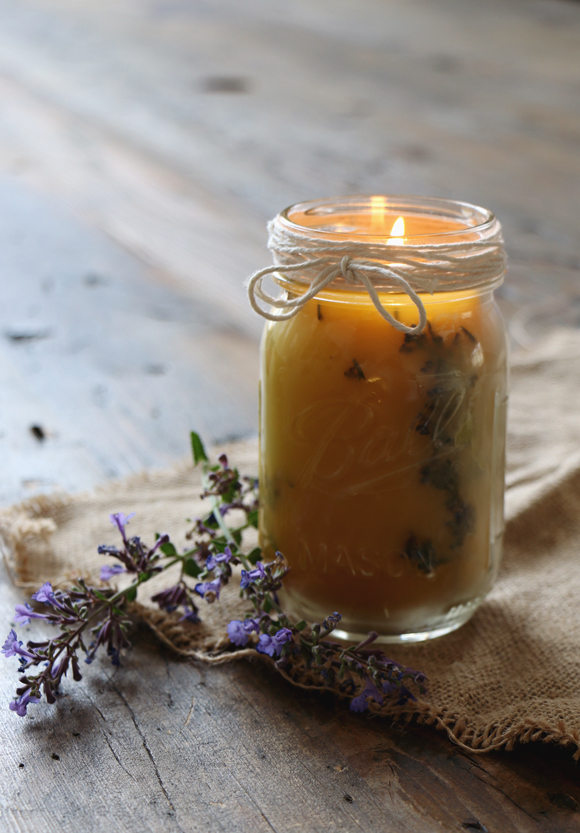
Light your candle on a chilly fall night and remember those farmer’s market flowers that brightened so many summer days.
More DIY projects from the BLDG 25 blog.